Provision for the Unseen: Bringing Service Access Into the Renovation Brief
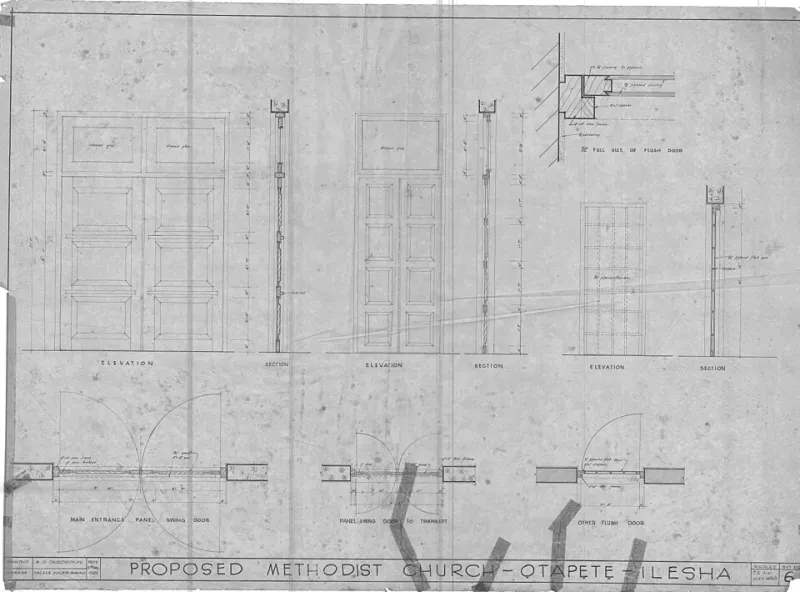
Photo: Onafowokan Michael Olutusen, CC BY-SA 4.0, via Wikimedia Commons
A room is usually judged by what can be seen: the line of a skirting, the flatness of a wall, the join between ceiling and plaster. Yet many of the decisions that determine whether that finish survives contact with daily life are made around services that disappear from view. Pipes, cables, ducts and valves must be routed, protected and, at times, reached again. The question for a renovation brief is not whether access will be needed, but how it will be provided without making the finished room look like a plant room in disguise.
Why access belongs in the brief, not the snag list
Service access is often treated as a detail for the end of a project, once the first fix is complete and the plaster is ready. That is usually too late. By then, the depth of a wall may be fixed, the ceiling may be closed, and the route to a stopcock or ventilation unit may depend on removing a neatly tiled panel. A considered approach treats access as part of the design, alongside lighting, heating and joinery.
The aim is not to fill a home with obvious hatches. It is to identify the small number of places where future maintenance is likely and to make those places reachable with the least disturbance. A concealed cistern, a underfloor heating manifold, a consumer unit, an extract fan or the filter on a mechanical ventilation system all have different service rhythms. Some need attention once a year; others may need none for a decade. The brief should distinguish between them.
This matters particularly in UK housing, where the age and construction of the building often shape what is possible. A Victorian terrace may offer shallow voids and awkward routes; a modern extension may provide generous ceiling depths but a more demanding thermal and airtightness strategy. In either case, access provisions should be agreed before the structure is closed, not negotiated after the room has been decorated.
Three forms of access, and what each is for
Most access strategies rely on a combination of three measures. The first is a service void: a deliberate gap in a floor, wall or ceiling that carries pipes, cables or ducts and keeps them separate from the finished surface. Voids can simplify routing, but they consume space and must be detailed for fire, acoustic and thermal performance where required. A void that is deep enough for a valve but too shallow for insulation may solve one problem while creating another.
The second is an access panel. These range from a simple hinged hatch to a flush, magnetic panel finished to match the surrounding plaster or tile. In a bathroom, a tileable panel can give reach to a concealed shower valve without disturbing the waterproofing. In a ceiling, a discreet hatch may provide the necessary clearance for a ventilation filter or fan. The panel should be sized for the task, not merely for the opening: hands, tools and replacement parts all need room.
The third is an inspection point. This may be a labelled isolation valve, a removable section behind an appliance, or a small hatch into a roof void. Inspection points are often the least visible and the most useful. They allow a problem to be identified before it becomes destructive.
Where access earns its place
Kitchens concentrate services in a small area. Under-sink isolation valves, appliance connections and waste traps should be reachable without emptying the whole cabinet. A boiler or heat pump cylinder may need clearance for servicing, and the route to a consumer unit should remain clear and compliant. In utility rooms, a stopcock and manifold are obvious candidates for an accessible panel, particularly where the floor finish is tiled.
Bathrooms require particular care. Concealed cisterns, shower valves, bath traps and extract ducting are common sources of future work. A flush access panel behind a tile or within a vanity unit can prevent a small repair from becoming a retiling exercise. Ventilation equipment should be positioned so that filters can be changed without dismantling a ceiling.
Ceilings deserve early attention. Where a mechanical ventilation system with heat recovery is installed, filter access is essential. The same applies to extract fans, isolation switches and any concealed pipework in a flat roof or loft conversion. In a room with a crisp plaster finish, a poorly placed hatch is conspicuous; a well-planned one in a cupboard, landing or utility area may be almost invisible.
Electrical connections require a careful distinction. Some joints must remain accessible under the wiring regulations, while others are designed to be maintenance-free. A renovation brief should not bury what needs to be reached. The contractor and electrician should confirm which points require access and how it will be provided.
Briefing the detail before the first fix
The most reliable moment to settle access is during the design and pre-construction stage, when the layout, ceiling heights and service routes are still fluid. The homeowner does not need to specify every panel, but the brief should ask a few direct questions. What will need servicing? How often? What clearance does the manufacturer require? Which routes will be concealed, and how will they be reached? Where will the access point be, and what will it look like?
These questions should be marked on drawings and carried into the site schedule. A panel agreed verbally is easily lost when the plasterer arrives. Photographs of the services before closure are also valuable, as is a simple record of what lies behind each panel. At handover, the homeowner should know where the access points are, what they serve and how to open them without damaging the finish.
Making discreet look deliberate
Good access design uses the room rather than fighting it. A panel can be set into a cupboard, concealed behind a removable plinth or aligned with a tile joint. Magnetic catches and flush frames reduce the visual interruption; a shadow gap or neat bead can make a ceiling hatch look intentional. In heritage or period properties, the approach may need to respect existing joinery and plaster details, and fire-rated elements must retain their performance.
None of this is an argument for unnecessary complexity. A simple, well-made panel in the right place is usually better than an elaborate concealment that is difficult to use. The finish should remain the priority, but it should not become a barrier to ordinary maintenance.
The maintenance test
A useful final check is to imagine the room five years after completion. If a valve fails, a filter needs changing or a waste trap blocks, can the work be done without cutting into a finished surface? If the answer is no, the access strategy is incomplete. In 2026, as homeowners increasingly invest in ventilation, heating controls and carefully finished interiors, that test is worth applying before the first board goes up. A smooth finish is not only one that looks complete; it is one that can be looked after.